A guide to installing, upgrading, and troubleshooting the SyncMatters on-premise agent
Topics:
Agent architecture
The agent consists of:
-
A small binary that is configured to run as a service on Windows. The Windows service name is
SyncMatters On-premise Agent, and -
The integration runtime, which is launched by the binary (1) when a connection operation is requested by a running integration
Integration logic always runs on SyncMatters cloud based servers; on-premise agents host connections and receive instructions from the running integrations to e.g. query connection named sql_server with specific filters.
Agent installation
The latest Windows installer for the agent can be downloaded from here:
https://downloads.syncmatters.com/agent/latest/SyncMattersAgent64.msi
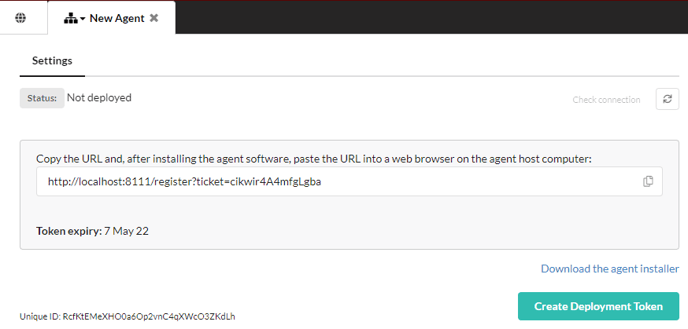
After installing the agent onto the on-premise server, you can generate an agent deployment token from the SyncMatters web UI:


On the PC that the agent was installed onto, open a web browser and paste the URL into the browser.
C# connector considerations
When the agent will use/host C# connections the following component must also be manually installed:
-
dotnet 7 by Microsoft (download the installer from here)
Agent upgrade
The agent will automatically stay up to date with the latest integration runtime, no special action is required for this to happen. The main agent binary (i.e. the service layer) may have fixes made available from time to time. The process to upgrade the service is:
-
Stop Windows service named
SyncMatters On-premise Agent, writing down the user account that the service is configured to run as-
By default the service will run as
Local system account, however it may be configured to run as a specific Windows user to, e.g., gain access to specific resources on the network -
If the service is anything other than
Local system accountyou will need to know the Windows username and password of the account to complete the upgrade
-
-
Download the latest installer from https://downloads.syncmatters.com/agent/latest/SyncMattersAgent64.msi
-
Uninstall the current version of the Agent
-
Install the new version
-
The Windows service will re-start automatically. If, in step 1, you found the Windows service was running as a different Windows user, stop the service and re-configure it to run as the prior user
-
Agent offline/fault-finding
Initial sign of problems:
You will find that syncs that must connect to systems hosted by that agent will fail.
From the PC that the agent has been installed onto:
1) Check that the agent service is running by open a web browser and directing it to: http://127.0.0.1:8111/
If the agent service is running, and the agent has been registered, you will get a response like this:
SyncMatters Agent status: Registered
Unique ID:NGJSaNOxi4l92NZBHZ1HWjYlUQmwZLzr
Logs:C:\Windows\system32\config\systemprofile\AppData\Local\syncmatters-agent\agent.log
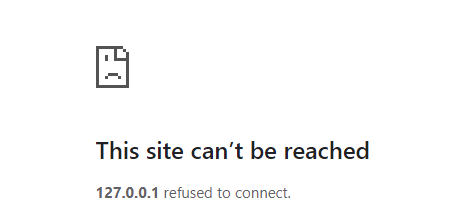
If the page will not open you will see something like this (Google Chrome):


In this case, check that the Windows service named SyncMatters On-premise Agent is running.
Where are the agent files stored?
On Windows the agent is installed as a service, and all services run a user. The default service user is on Windows is the Local system account and, unless changed, this is the user account that the agent will run as. This Windows user has it’s local application files stored here:
C:\Windows\system32\config\systemprofile\AppData\Local
The agent makes use of 2 x sub folders:
-
syncmatters-agent: Primary folder holding agent related files:-
config.static.json: Holds static settings used by the agent; these can be adjusted to, e.g., connect the service to a QA cluster or to enable more verbose logging -
config.dynamic.secure: Encrypted file holding the keys used to authorize the agent service's connection to IntegrateHQ - you will not generally need to access or modify this file -
agent.log: Local service log file, may hold useful diagnostic logs
-
-
sm-nodejs: Holds a version of nodejs fully managed by the agent service
If the Windows service is configured to run as a specific user, then the agent files will appear under that User account’s AppData folder, e.g. if JohnSmith the folder would be C:\Users\JohnSmith\AppData\Local.
Enabling verbose logging
The config.static.json noted previously can created (or modified) to include include the following directive:
{ "VerboseLogging": true, }
The Windows service must be restarted after making the adjustment. After this, more detail will be captured to the agent.log file.
For more information or further assistance, please contact support@syncmatters.com.
